(🇻🇪/🇺🇲) 👐Manos a la obra👉: 💁Así fabriqué un micrófono artesanal tipo "lavalier"🎙️/👐Let's get to work👉: 💁Here's how I made a homemade "lavalier" microphone🎙️


Volver a Hive después de unos tres meses sin postear implicó llevarme algunas sorpresas. Una de ellas es lo lejos que ha llegado 3speak: su versatilidad, constantes mejoras y actualizaciones, opciones y diseño moderno hacen que cualquiera se entusiasme a publicar.
Incluyéndome.
A la fecha, no me he decidido subir un vídeo en 3Speak. Quizás porque le he dado muchas vueltas o porque no me lo he tomado en serio. Pero también porque he pensado en la capacidad de mi smartphone pues no estoy muy seguro de la calidad del audio. Es un Itel a60, un ejemplar económico de gama baja con muchas limitaciones. Así que pensé adquirir un micrófono para optimizar el sonido. El caso es que en mi ciudad no encontré en los negocio de repuestos y accesorios para celulares un micrófono tipo lavalier compatible. Solamente contaban con ejemplares inalámbricos pero no me alcanzaba el presupuesto.
Entonces recordé una idea que ví hace un tiempo mientras hacía scroll en Youtube y que desde entonces venía rumiando dentro en mi cabeza: fabricar un micrófono casero. Por cuestión de honestidad y transparencia, debo decir que no soy el autor de ésta idea, pero el procedimiento si lo adapté a mi necesidad y recursos.
Mira cómo lo hice 👇
MATERIALES (que utilicé)
- Unos auriculares (cualquiera, no importa la marca, pero que el micrófono le funcione)
- Una mascarilla (color negro)
- Una tira de tela tipo peluche (2cmx10cm) o hecha de fibra acolchada
- Silicon de manualidades (puede ser frío o de pistola)
- Una tijera
- Una regla
- Una pinza tipo cocodrilo (o cualquier otra pinza que sirva para ajustar el micrófono a la ropa)

(Estos fueon mis materiales base, los demás implementos y accesorios no aparecen aquí 😅)
PASO 1
Con la tijera, corté con cuidado los cables de los audífonos a la altura del micrófono.


PASO 2
Tomé luego la tira de tela acolchada y con ella cubrí el micrófono. La pegué con silicón cuidando de no obstruir el orificio de entrada de audio.


PASO 3
Seguí repitiendo el proceso hasta terminar de envolver con la tira. El objetivo es crear una resistencia o un rebote a los ruidos del entorno y el eco que suelen captar este tipo de receptores.
PASO 4
En este punto entra en juego la mascarilla.

Corté los extremos que tienen la tira elástica y suelen sujetarse sobre las orejas.

Luego, en la parte útil coloqué el micrófono ya cubierto y tomé las medidas del mismo. Fueron 4 cm.

Una vez tomadas éstas medidas, recorté una circunferencia de 8 cm de diámetro que será la cobertura final del micrófono y le dará ese color negro que necesito.


PASO 5
Luego doblé la circunferencia del material de la mascarilla sobre el micrófono y coloqué puntos de silicón para pegar sus bordes a la base del mismo y de ese modo ir fijando la cobertura.


PASO 6
A partir de aquí solo me quedaba seguir fijando con silicón la tela de la mascarilla al micrófono asegurándome de cubrirlo bien.


PASO 7
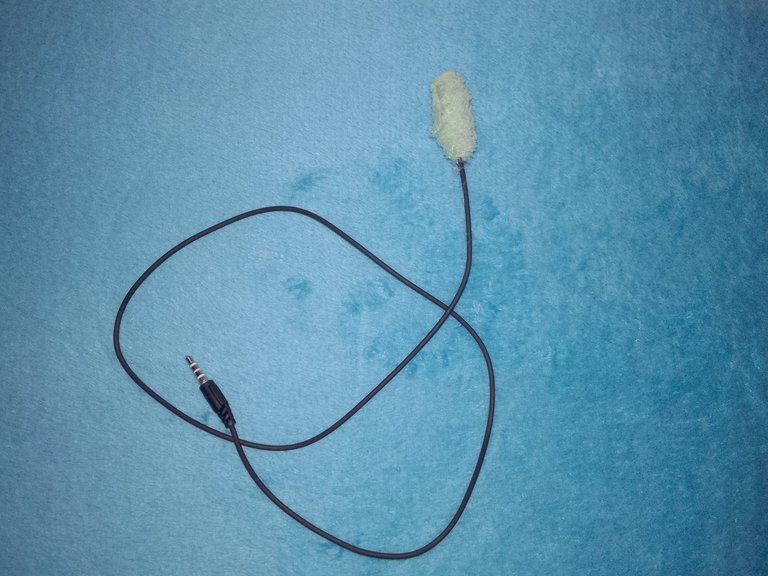
A continuación, ajusté los detalles estéticos, recorté los excedentes de tela, agregué un poco más de pegamento para fijar la base y quedó así.

PASO 8
Por último, tomé la pinza de cocodrilo y la pegué a la base del micrófono para poder fijarlo a la ropa al usarlo.


La única limitación que tendré con este micrófono casero es el largo de su cable, por lo tanto solo servirá para grabar videos en modo selfie y primer plano.
Y bien... Ahora solo queda grabar mi presentación en la comunidad 3speak y comprobar la funcionalidad de este invento. 😅 Mañana lo estaré subiendo y allí me darán sus impresiones experimentadas✌️

Returning to Hive after about three months without posting brought a few surprises. One of them is just how far 3Speak has come: its versatility, constant improvements and updates, features, and modern design make anyone excited to post.
Including me.
So far, I haven’t decided to upload a video to 3Speak. Maybe because I’ve been overthinking it, or because I haven’t taken it seriously. But also because I’ve been thinking about my smartphone’s capabilities—I’m not very sure about the audio quality. It’s an Itel a60, a budget, low-end model with many limitations. So I thought about buying a microphone to improve the sound. The thing is, I couldn’t find a compatible lavalier-style microphone at any of the cell phone parts and accessories stores in my city. They only had wireless models, but they were out of my price range.
Then I remembered an idea I saw a while back that I’d been mulling over in my head ever since: making a homemade microphone. In the interest of honesty and transparency, I must say that I am not the originator of this idea, but I did adapt the procedure to my needs and resources.
Check out how I did it 👇
MATERIALS (that I used)
- A pair of headphones (any kind, any brand—as long as the microphone works)
- A face mask (black)
- A strip of plush-like fabric (2 cm x 10 cm) or made of quilted fiber
- Craft silicone (can be cold-set or hot-melt)
- A pair of scissors
- A ruler
- An alligator clip (or any other clip that can be used to attach the microphone to clothing)
(These were my basic materials; the other tools and accessories aren't shown here 😅)
STEP 1
Using the scissors, I carefully cut the headphone wires at the microphone.
STEP 2
I then took the strip of padded fabric and used it to cover the microphone. I secured it with silicone, being careful not to block the audio input hole.
STEP 3
Keep repeating the process until you’ve finished wrapping the strip around it. The goal is to create resistance or a barrier against ambient noise and echoes that these types of receivers tend to pick up.
STEP 4
This is where the mask comes into play.
I cut off the ends with the elastic straps that usually go over the ears.
Then, on the usable part, I placed the already-covered microphone and measured it. It was 4 cm.
Once I had taken these measurements, I cut out a circle with a diameter of 8 cm, which will serve as the final cover for the microphone and give it the black color I need.
STEP 5
Then I folded the edge of the mask material over the microphone and applied silicone dots to attach its edges to the base of the microphone, thereby securing the cover.
STEP 6
From here on, all I had to do was keep attaching the mask fabric to the microphone with silicone, making sure to cover it well.
STEP 7
Next, I tweaked the aesthetic details, trimmed off the excess fabric, added a little more glue to secure the base, and this is how it turned out.
STEP 8
Finally, I took the alligator clip and glued it to the base of the microphone so I could attach it to my clothes when wearing it.
The only limitation I'll have with this homemade microphone is the length of its cable, so it'll only work for recording videos in selfie mode and close-ups.
Well... Now all that's left is to record my presentation for the 3speak community and test out how well this invention works. 😅 I'll be uploading it tomorrow, and they'll give me their honest feedback there✌️


Portada: Dola IA
Fuente de la idea: Youtube
Traducción al Inglés: DeepL App
Las fotografías son de mi propiedad, tomadas con un Itel a60
Cover: Dola AI
Source of the idea: YouTube
English translation: DeepL App
The photos are my own, taken with an Itel a60
¡Wooow es una excelente idea! y con artículos que están a la mano sin complejidad, ya quiero ver cómo funciona. Gracias por el paso a paso @moito. Saludos
También me sorprendió cuando lo supe. 🤭 Como dije, es para empezar a publicar en 3Speak asi que ya he hecho algunas pruebas y pues me ha dejado satisfecho.
Tengo planeado subir mi primer video mañana. A ver que tal me va por alli 😅
✌️😌✌️
Pues éxito y ahí veremos cómo queda jajaja, pudiendo mejorar así la calidad de los audios me apunto para probar el paso a paso en casa😎 creo que sólo me faltaría la silicona😅